Nosotros have had a few brands reach out to united states request for communication on the Facebook Domain Verification procedure if you take a Shopify eCommerce store so we though we could reply this with a unproblematic blog post, merely if your struggling please feel free to reach out to us.
What is Facebook Domain Verification?
Domain Verification provides a style for you to merits ownership of your domain in Business Manager. This ownership allows you to control editing privileges of your links and other content to prevent misuse of your domain and to continue bad actors from spreading misinformation.
Who is Facebook Domain Verification for?
Domain Verification is the best way to handle ownership if:
You have a larger number of Pages that are difficult to maintain manually via Open up Graph markup tags
Yous have adopted or have the power to prefer Business concern Manager to manage your assets
Yous have the ability to upload HTML files to the web root directory or the ability to edit DNS TXT records
You tin can edit Link Folio Posts that link to content you own—buying will somewhen serve every bit a means to determine who has access to link editing
You want to control who can edit link descriptions on ads pointing to your domain.
You take two options available to you when verifying your domain HTML Verification or DNS options just nosotros experience the simplest & quickest selection for you is a simple cutting and paste option of the HTML code.
Option one – Using HTML Meta Tag Upload (The Easiest Pick)
Upload an HTML file to your spider web directory and confirm domain ownership in Concern Manager
Best Choice Is To Utilise HTML Meta Tag Upload
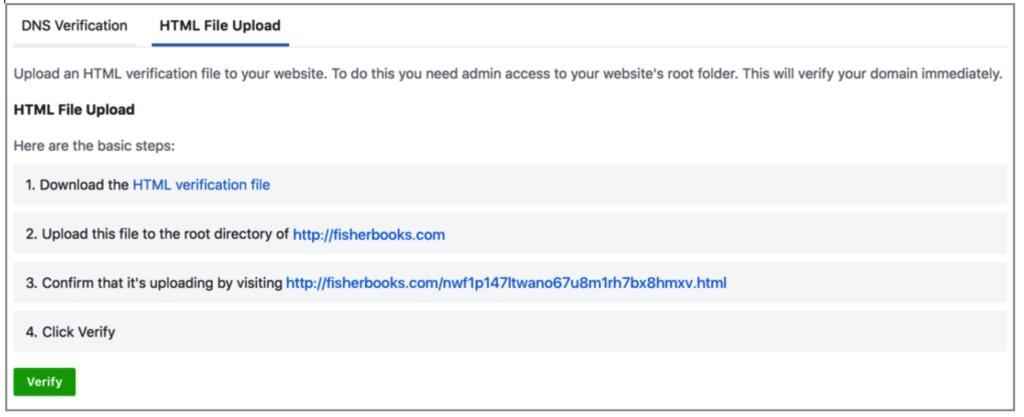
The HTML File Upload tab of your selected domain provides the HTML verification file yous need to upload to your website.
Download the HTML verification file.
Upload the file to the root directory of your website. You will exist able to see that it is uploading at the link provided in the HTML File Upload tab.
Once it is done, click the Verify button at the bottom of the HTML File Verification tab for the selected domain.
Leave the HTML verification file in your website'southward root directory as it may exist checked periodically for verification purposes.
You need admin admission to your website'due south root folder to perform this type of verification.
How To Add together The HTML Facebook Domain Verification In Shopify
Step 1: Use a meta tag verification method
In the third-party site, you can accept an option to verify your site utilising a meta tag verification method.
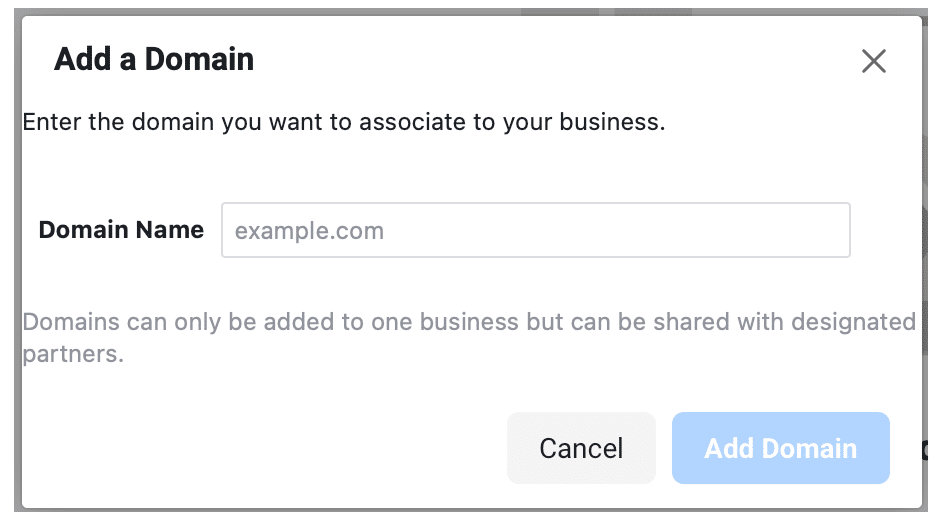
You lot will need to become to your Facebook Business Manager and then Business organisation Settings > Brand Rubber > Domains > And so Add
Yous Will Need To Add together The URL You Want To Verify
You volition need to enter your domain Name and then y'all will exist presented with 3 options
Enter Your Full URL That Needs Verifying
1. DNS – Add together a DNS TXT record to your domain host to prove that you ain the domain.
2. HTML File Upload – Upload an HTML verification file to your website.
3. Meta-tag Verification – Set the meta-tag containing the verification code into the <caput> section of your website's homepage. If choosing this we would recommend leaving this in identify as Facebook may check dorsum on your site.
Step 2: Copy total meta tag to your clipboard
Highlight the full meta tag on the third-political party site and re-create information technology to your clipboard with cmd + c on a Mac or ctrl + c on a PC. You must choose everything, even the < and >. You tin can take a look at the instance: <meta name="facebook-domain-verification" content="xxxxxxxxxxxxxxxxxxxxxxxxxxxxxxxxxxx" />
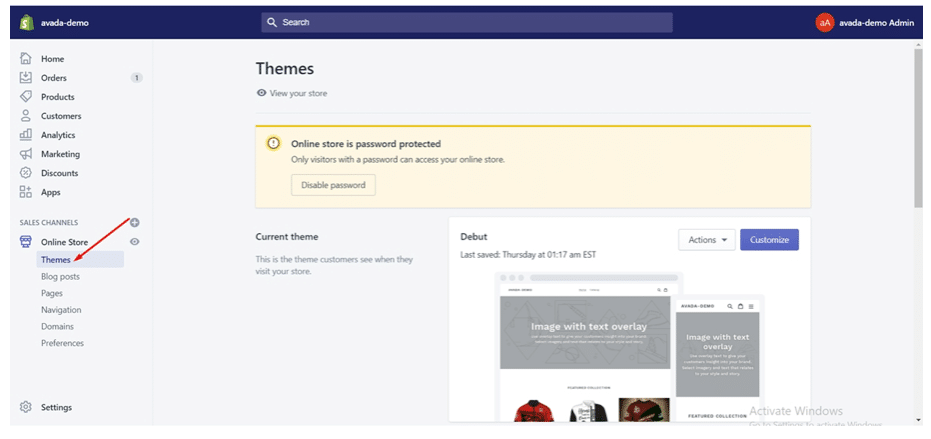
Stride three: Go to Themes
In your Shopify admin, keep to the Online Store section, then click Themes.
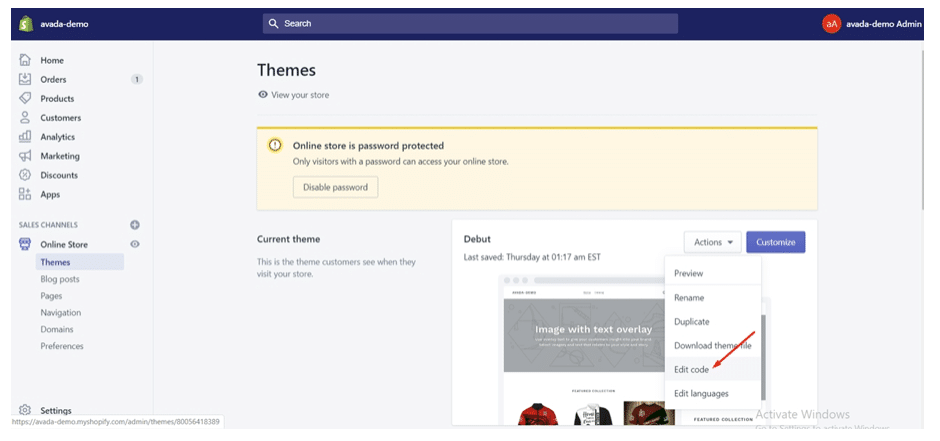
Pace four: Click Edit code
Identify the theme you intend to accommodate, tap on Deportment, and then Edit code.
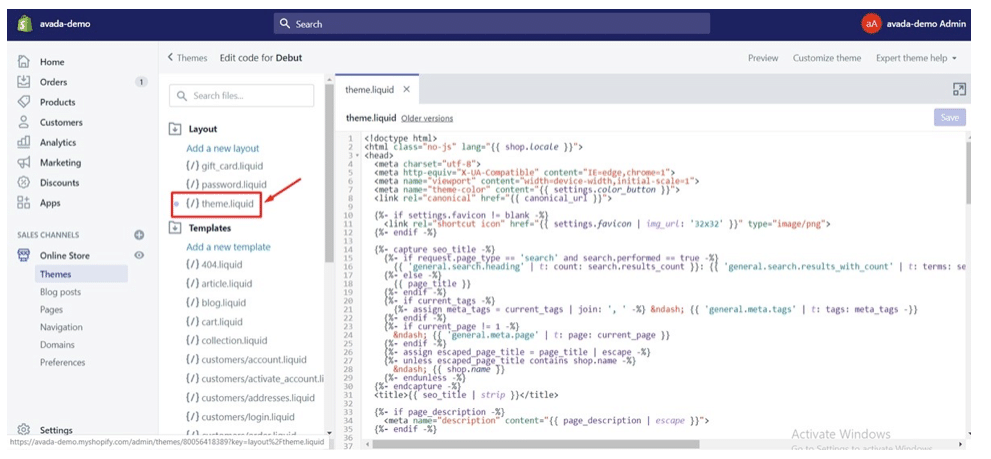
Step v: Click theme.liquid
The <header> is in your theme.liquid file. From the Layout section, tap on theme.liquid to open the file in the online lawmaking editor.
Step six: Paste the meta tag that you copied
Paste the meta tag that you lot copied on a blank line right under the opening <head> tag or before the showtime <body> tag.
Footstep 7: Tap on Save
Option 2 – DNS Verification with Facebook ( If you bought your domain in Shopify)
If you lot're looking to add together a record to your DNS settings for verifying your domain with 'Facebook' with your Shopify Domain, your going to need to go the domains page in your admin, there's a button to manage your Shopify-purchased domain.
Below are some steps here to aid with navigating and locating the DNS settings button:
Starting time you'll want to navigate to your domains folio, that'south located under 'Online store > Domains'.
Then click manage on your Shopify-purchased domain.
On the side by side folio, wait for a DNS settings button near the acme of the folio.
From there, you tin can add Facebook'southward DNS records for verifying your domain.
Boosted Notes On DNS TXT Record
Hither is a link to Facebook's domain verification in Business Manager guide, you can verify your domain using HTML upload or DNS TXT record. With the TXT record, you lot tin can simply put 'Facebook' for the name of the TXT record.
The name 'Facebook' on the new tape is to help differentiate between other records that you might have in your DNS and, even if it'due south left blank, information technology doesn't bear upon the domain verification.
Once you've added Facebook's TXT record, you'll need to hop back on Facebook'south Business Manager to complete domain verification.

0 Response to "How to Upload Meta Tag to Facebook"
Post a Comment